Tyrannosaurus Midi-Forge
(Rolling your own sheet steel)
Acknowledgments and Background Info
A great deal of thanks go to friend and blacksmithing instructor,
Scott Thomas, who has not only been a great inspiration in learning how to
forge, but Ardenwood Forge is
one of the all time best shops I've had the pleasure to work in. Without
Scott's help, I might not had been so persistent to build a forge, or dig
deeper into moving metal. Scott is a great help to my local community in
helping folks to forge and learn about traditional crafting. I am certain
his other students would agree that his help to teach others is nothing
short of outstanding. Scott teaches folks to use traditional techniques
to solve problems in the modern world. Scott has also helped me out with
the sheet steel, as well as some of the tubing, scrap iron for the handle
and stock for the base and work supports, etc...Visit Scott's website, Ardenwood Forge to see some of
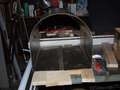
his work.Scott taught me how to roll the sheet of steel on a old roller.
I calculated the circumference of the top circle, and divided by 4 to get
1/4 the sum, for each side of the top. The rest was just math to
calculate the balance of the sheet and how wide the bottom would be, which
was 14". The top was a 14" circle, 7" from the center of the circle to
the bottom and 7" on each side to form the bottom. Thanks Scott!
The other person I would like to acknowledge is friend and fellow
smith, Ron Reil, whom I know many folks in the blacksmithing community are
grateful for all the wonderful information Ron has provided on his excellent website.
Such a great resource, more folks 'seem' to have been inspired by Ron's freon tank
mini-forge than any one other single forge. This forge borrows off
much of Ron's basic design, and makes some modifications to accomodate a
larger forge chamber than his freon tank
mini-forge, as well as trying to make a more stable (i.e., flat;-)
base. The intention was to design a forge chamber that was large enough
to accomodate a 3/4"
T-Rex burner. Knowing that the freon tank mini-forge was too small
for a T-Rex, and that the Shorty was created
for that purpose, it made sense to make the chamber larger, if I did plan
to use a T-Rex. Thanks also go to Rex Price of Hybrid Burners who makes these
great burners.
The next question was how large of a chamber would be needed. I had
originally thought that 14" of depth would be good for a slightly larger
chamber (and it could very well be a fine size). However, in the end I
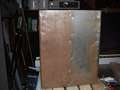
just left a standard sized piece of 18"x48" sheet of 15 gauge steel
without cutting it and ended up with 18" in length and just rolled/folded
the sheet. Color me lazy if you will, but the size does seem to make
sense to me.
With all the above being considered, I knew I wanted to build a single
burner forge, with a chamber large enough to utilize the T-Rex. Ron felt his
4-burner forge is fine with a single T-Rex for most all of his work, and
will keep about 75 percent of the forge hot. This suggested that about
18" was about right if the chamber was the same aprox. diameter. Since
the sheet was 18", it all just kinda added up in the end somehow. I also
wanted to keep the design as light as possible so that I would feel
comfortable carrying it around if needed.This is no small challenge in
itself, since most of the refactory materials and ceramic shelving is
HEAVY!;-) So, in light of that (intentional pun;-) I stuck with a lighter
gauage 15 sheet steel, opposed to many of the schedule 40 and schedule 80
pipe that many have used, those are just too darn heavy!
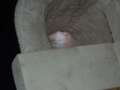
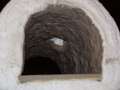
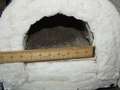
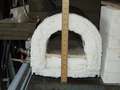
The size of a freon tank only presents a chamber which is about 4"-5"
diameter after 2" of insulation. Stepping up to an 8" diameter chamber
presents a much greater area to work within.
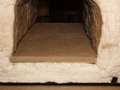
I also added an extra 1" of kaowool around the chamber than the more
common 2". I will incorporate a simple wall of bricks on the front and
rear, but will allow for the optional rear wall. This will allow for a
means to reduce the size of the chamber. I also incorporated some
features from Ron's 4 burner pipe forge, like the idle full loop, to add
the energy savings aspect of the design. So much was influencened in this
forge from Ron's pages, and from Ron directly, it would be hard to list.
But I can certainly applaude Ron for his great generosity to the various
smithin' communities at large. Thanks so much Ron!
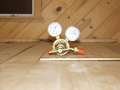
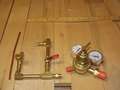
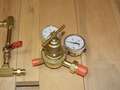
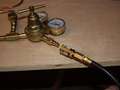
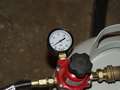
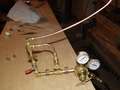
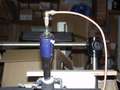
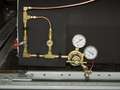
I bought a used Victor 261-B regulator (Liquid Propane Regulator) on ebay
for $25, and paid another $50 to have Jim Billingsley at Regulator and Torch Repair
rebuild it with new parts. It came out nice. Thanks Jim! All new gauges
and soft parts as well as cleaned up. These regulators cost about
$150-$200 otherwise.(ouch!)
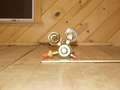
I also picked up an idle circuit kit from
Larry Zoeller, at Zoeller
Forge, down in Kentucky. Nice quality needle valve. I also got the
durablanket at Zoeller Forge also, Larry gave me a great deal as he had
one last piece of 2" left that was 14"x24". That size worked out perfect
for the floor of my 14" wide forge body, and while the 2" is more
difficult to work with I'm told, this was perfect to line the bottom.
I bought various pieces locally, ITC-100, 18 sq.ft. of 1" kaowool,
ceramic standoff section, refactory mortar, 1/2" x 18" x 18" ceramic shelf
for kilns, etc...at the Clay
Planet in San Jose. These folks are great to deal with, have great
pricing on kaowool if you're local ($2.40 sq.ft), and one of the few
places to have refactory products for sale in the Bay area.
News Flasharoo! 04/27/2007...While discussing the plumbing with
Ron Reil, he reminded me that in most states of the U.S., flared fittings
are required for gas, and that compression fittings as most folks use are
technically not up to code. Considering that in the event one of my neighbors
would dislike my forging, that could be a flag if the police, or worse
building inspectors, came over while I was forging...the small price is
worth the piece of mind for me. I was able to borrow a flaring tool from
my friend, DL, the ace Porsche mechanic. All fittings that were previously
planned for compression connectors have been changed to flared connectors,
as code requires.
Photo Gallery
| |
 |
 |
 |
 |
 |
|
| |
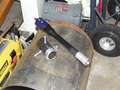
Burner/Holder |
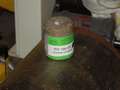
ITC-100 |
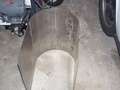
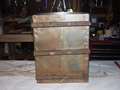
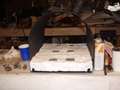
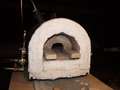
Sheet Steel |
Radius Marks |
Before Fold |
| |
 |
 |
 |
 |
 |
|
| |
Bottom Folded |
Bottom Rivets |
Inside Rivets |
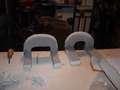
Cut Standoffs |
Standoff Bolts |
| |
 |
 |
 |
 |
 |
|
| |
Standoffs |
Shelf |
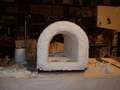
Front |
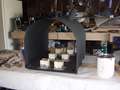
Guides |
Installed |
| |
 |
 |
 |
 |
 |
|
| |
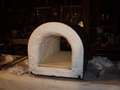
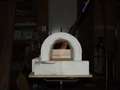
Fugly |
Side View |
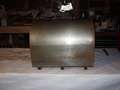
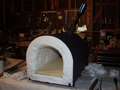
Painted |
Bottom Painted |
Standoffs |
| |
 |
 |
 |
 |
 |
|
| |
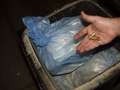
Durablanket |
Durablanket Installed |
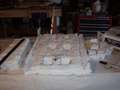
Testing Floor |
Kaowool |
Floor Mortared |
| |
 |
 |
 |
 |
 |
|
| |
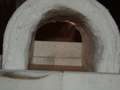
Burner Entry |
ITC-100 Ready |
Burner Plug |
Reg. Front |
Reg. Rear |
| |
 |
 |
 |
 |
 |
|
| |
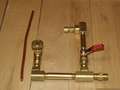
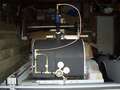
Plumbing |
Idle-Full |
Regulator |
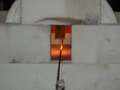
First Fire1 |
First Fire2 |
| |
 |
 |
 |
 |
 |
|
| |
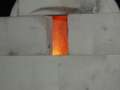
2nd Fire1 |
After 2 |
Entry2 |
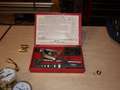
FlareTool |
Flared Tube |
| |
 |
 |
 |
 |
 |
|
| |
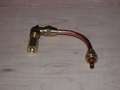
Flared Fit |
Flare Connected |
Idle-Loop-2 |
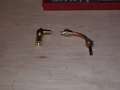
Disconnect |
Entry Now |
| |
 |
 |
 |
 |
 |
|
| |
Cleaner Flame |
Looks OK |
ITC Chamber |
ITC Floor |
ITC Firing |
| |
 |
 |
 |
 |
 |
|
| |
1st Steel |
About 10min |
3 PSI |
Pritchel, 2min |
Installing Comp Fittings |
| |
 |
 |
 |
 |
 |
|
| |
Regulator/Idle |
Plumbing Assembled |
Floor Moved-Up |
Chamber Width |
Chamber Height |
| |
 |
 |
 |
 |
 |
|
| |
Walls |
Height |
ITC Damage |
Plumbing |
Burner |
| |
 |
 |
 |
 |
 |
|
| |
Idle Installed |
Shut-Off |
Master Shut-Off |
Fr/Rr Walls |
Rear Wall |
| |
 |
 |
 |
 |
 |
|
| |
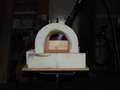
Front Wall |
Plumbing |
Idle Test |
1300 Deg. |
Stand |
| |
 |
|
| |
Almost Welding |